May 10, 2026
Written and edited by Anwar
Anwar founded HandwritingTool and edits the site's guides on handwriting conversion, page layout, printable documents, and writing workflows.
Updated June 8, 2026. Each guide is reviewed for clarity, practical usefulness, and responsible page-creation workflows.
Create Handwritten Pages Online Free for Creative and Professional Projects
Creating handwritten pages online is useful when you want typed text to feel warmer, more personal, or more visually interesting. Instead of rewriting every line by hand, you can draft on a keyboard, paste the text into a handwriting page maker, choose a paper style, adjust spacing and ink, preview the result, and export the page as PDF, PNG, or JPG.
This workflow is helpful for creative and professional projects where the final page needs a human touch. Writers can create fictional letters, poetry pages, or character notes. Teachers can prepare worksheet examples and classroom visuals. Designers can test handwritten-style layouts for packaging, cards, posters, and social graphics. Journal keepers can turn typed reflections into printable journal pages. Content creators can make note-style images for newsletters, carousels, thumbnails, and downloads.
The goal is not to fake messy writing. The goal is to create readable handwritten-style pages that look intentional, organized, and useful for the project in front of you.
If you are new to this workflow, start with the broader how to convert text to handwriting guide. If your final output should be a document, read the text to handwriting PDF generator guide. For ruled paper layouts, use the text to handwriting on lined paper guide. For natural-looking output, keep the realistic handwriting checklist nearby.
What Are Handwritten Pages Online?
Handwritten pages online are digital pages that combine handwriting-style text with page design controls. A good handwritten page maker does more than apply a font. It lets you shape the whole page:
- Handwriting style
- Paper type
- Ink color
- Font size
- Line spacing
- Word spacing
- Margins
- Page size
- Export format
Those controls matter because a handwritten-style page should feel like a complete visual object. A recipe card needs different spacing from a journal page. A greeting card draft needs more white space than a teacher worksheet. A design mockup may need blank paper or image export, while a printable worksheet may need PDF.
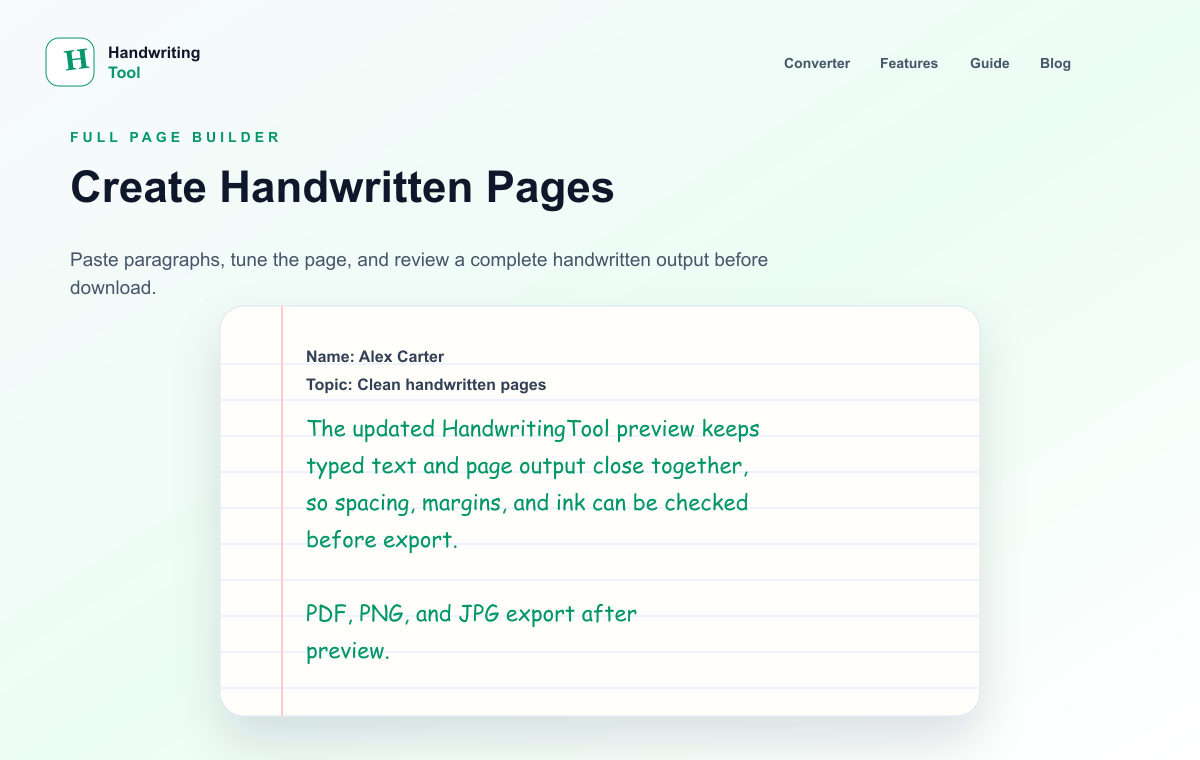
HandwritingTool is designed around this full-page workflow. You can type or paste text, preview the handwritten page, adjust the layout, and download the final result directly in your browser.
Why Use a Handwritten Page Maker?
Typing first is faster for planning, editing, and proofreading. Handwriting-style formatting is useful after the words are ready. This gives you the best of both workflows: keyboard speed while drafting, and a handwritten look when presenting.
Creative and professional teams use this kind of tool for:
- Journal pages and printable reflection sheets
- Creative writing drafts, fictional notes, and poetry pages
- Teacher worksheets, examples, and classroom handouts
- Recipe cards and kitchen printables
- Greeting card drafts and message previews
- Design mockups for packaging, stationery, posters, and social content
- Newsletter inserts and downloadable note-style resources
The biggest advantage is iteration. If the text changes, you can edit the typed version, regenerate the page, and export again. That is much easier than rewriting a page every time a heading, line break, or message changes.
How to Create Handwritten Pages Online Free
Use the free handwritten page generator and follow this basic workflow.
Step 1: Write Clean Source Text
Start with text that is already edited. Remove duplicate spaces, fix typos, and break long paragraphs into smaller sections. Handwritten-style pages look best when the source text has a clear rhythm.
For creative projects, think about the page as a visual composition. A journal reflection can use short paragraphs. A recipe card needs ingredients and steps. A greeting card draft may need one strong message with generous spacing.
Step 2: Paste the Text into the Tool
Paste your text into the converter. The page preview gives you a first look at how the writing flows. Do not worry if it is not perfect yet. The first preview is a starting point.
If the page feels too dense, edit the text before changing every setting. Shorter sections, clear line breaks, and concise headings often improve the output quickly.
Step 3: Choose the Paper Style
Paper changes the tone of the page.
| Project | Suggested Paper | Why It Works | | --- | --- | --- | | Journal page | Lined or blank | Feels personal and calm | | Creative writing note | Blank or lined | Keeps the focus on the words | | Teacher worksheet | Lined or blank | Easy to read and print | | Recipe card | Blank | Clean space for ingredients and steps | | Greeting card draft | Blank | More polished and less busy | | Design mockup | Blank or graph | Flexible for layout testing |
Lined paper gives structure. Blank paper feels cleaner. Graph paper can work for planning pages, grids, and layout experiments.
Step 4: Pick a Readable Handwriting Style
Choose a handwriting style that fits the project. A calm, readable style works best for worksheets, recipe cards, and longer journal pages. A more expressive style can work for short greeting messages, quotes, or fictional notes.
Avoid using an overly decorative style for long text. It may look attractive in one line, but it can become tiring when the page has several paragraphs.
Step 5: Adjust Size, Spacing, and Margins
Start with medium text size, natural word spacing, and slightly open line spacing. Then preview the full page.
Use wider margins for greeting card drafts, recipe cards, and design mockups. Use slightly tighter spacing for worksheets or printable guides where the page needs to hold more information.
If the content feels crowded, increase line spacing or split the text. If the page feels empty, increase text size only after checking whether the layout needs a heading, subtitle, or section break.
Step 6: Choose Ink Color
Blue and black are the safest choices. Blue ink gives a casual note-like feel. Black ink works well for polished printables, teacher pages, recipe cards, and design mockups.
For creative visuals, you can experiment with softer tones, but keep readability first. If a page will be printed, high contrast is usually better than a pale decorative color.
Step 7: Preview Before Downloading
Preview the entire page, not just the first few lines. Check whether the text fits inside the page, margins look balanced, paragraphs are easy to read, and the paper style matches the project.
This step is where a handwritten page starts to feel professional. Small adjustments to spacing and margins usually improve the final result more than switching fonts repeatedly.
Step 8: Export as PDF, PNG, or JPG
Choose the format based on the final use:
| Format | Best For | | --- | --- | | PDF | Printable pages, worksheets, multi-page resources | | PNG | Social graphics, mockups, high-quality image previews | | JPG | Smaller image files, quick sharing, card previews |
If you want one printable file, use PDF. If you want to place the page into a design tool or social post, PNG is often better.
Real Use Case Examples
Here are practical examples showing how different users can create handwritten pages online.
Example 1: Create a Printable Journal Page
A journal page works best when it feels open and reflective.
Step 1: Draft the Reflection
Write a short reflection, gratitude list, weekly recap, or set of journal prompts. Keep paragraphs short so the final page does not look crowded.
Example structure:
- Date or title
- One short opening sentence
- Three reflection prompts
- A closing note or intention
Step 2: Choose Lined or Blank Paper
Use lined paper if you want the page to feel like a notebook. Use blank paper if you want a cleaner printable insert.
Step 3: Use Gentle Spacing
Choose medium text size and slightly open line spacing. Journal pages feel better when they have breathing room.
Step 4: Export as PDF
Download as PDF if you want to print the page and place it in a binder, planner, or journal.
Example 2: Make a Creative Writing Page
Writers can use handwritten pages for poems, fictional letters, story clues, character notes, or worldbuilding fragments.
Step 1: Choose a Short Passage
Pick a passage that benefits from handwritten presentation. A poem, short letter, or character note usually works better than a long chapter.
Step 2: Match Style to Voice
For a calm narrator, choose a clean handwriting style. For a more emotional note, use a softer or more expressive style. Keep readability high.
Step 3: Use Blank Paper
Blank paper keeps attention on the words. It also works better if you plan to place the page inside a design, book mockup, or visual scene.
Step 4: Export as PNG
PNG is useful if the handwritten page will become part of a visual asset, mood board, or social post.
Example 3: Build a Teacher Worksheet
Teachers often need quick printable examples, guided practice pages, warm-up questions, or note-style handouts.
Step 1: Organize the Content
Use a clear heading, short instructions, and numbered questions or examples. Keep each section easy to scan.
Step 2: Choose Lined or Blank Paper
Lined paper can make examples feel approachable. Blank paper is better for clean handouts and worksheet-style layouts.
Step 3: Prioritize Readability
Use black or blue ink, medium-large text, and open spacing. A worksheet should be easy to read from a printed page.
Step 4: Export as PDF
PDF is best for printing, saving, or sharing a complete worksheet.
Example 4: Design a Recipe Card
Recipe cards need structure. The final page should feel warm but still easy to follow.
Step 1: Split Ingredients and Steps
Use a short title, an ingredients list, and simple numbered steps. Avoid long paragraphs.
Step 2: Use Blank Paper
Blank paper gives the recipe a clean card-like feel. It also leaves room for decorative borders or images in another design tool.
Step 3: Keep Spacing Practical
Ingredients can use tighter spacing. Steps need more room so each instruction is easy to read.
Step 4: Export as PNG or PDF
Use PNG if you want to place the recipe card inside a design. Use PDF if you want to print it directly.
Example 5: Draft a Greeting Card Message
A greeting card draft helps you test wording before making the final design.
Step 1: Write a Short Message
Keep the message concise. Greeting cards usually look better with fewer words and more white space.
Step 2: Choose Blank Paper
Blank paper creates a polished preview. If you want a casual card, lined paper can also work.
Step 3: Increase White Space
Use a slightly larger text size, open line spacing, and wider margins. This makes the message feel intentional.
Step 4: Export as JPG or PNG
Use JPG for a quick preview or PNG for a sharper design asset.
Example 6: Create a Design Mockup
Designers can use handwritten pages to test labels, packaging notes, social layouts, stationery concepts, or poster text.
Step 1: Draft the Exact Copy
Use the real text that will appear in the design. Mockups are most useful when the wording and line lengths are realistic.
Step 2: Choose Paper Based on Context
Blank paper works for clean brand visuals. Graph paper can work for planning, technical layouts, or editorial mockups.
Step 3: Export as PNG
PNG is easier to place into design tools, presentation slides, or mockup scenes.
Step 4: Test Scale
View the exported page at the size it will appear in the final design. Handwriting that looks good full-screen may be too small inside a thumbnail or product mockup.
Best Settings for Creative and Professional Pages
Start with these settings, then adjust based on the preview.
| Goal | Paper | Ink | Size | Spacing | Export | | --- | --- | --- | --- | --- | --- | | Journal page | Lined or blank | Blue | Medium | Open | PDF | | Creative writing page | Blank | Black or blue | Medium | Slightly open | PNG or PDF | | Teacher worksheet | Lined or blank | Black | Medium-large | Open | PDF | | Recipe card | Blank | Black | Medium | Normal | PNG or PDF | | Greeting card draft | Blank | Black or custom | Medium-large | Open | PNG or JPG | | Design mockup | Blank or graph | Black | Depends on layout | Normal | PNG |
The best setting is the one that supports the final use. A worksheet needs clarity. A greeting card needs space. A recipe card needs structure. A mockup needs export flexibility.
Tips for Better Handwritten Page Output
Keep Text Shorter Than You Think
Handwritten-style pages need more room than typed documents. Short sections usually look better than dense blocks.
Use Headings Carefully
A short heading can make the page easier to understand, but too many headings can make a handwritten page feel cluttered.
Leave Comfortable Margins
Margins make the page feel intentional. They also help if the page will be printed, cropped, or placed inside a design.
Preview at the Final Size
If the page is for print, preview it as a full page. If it is for social media or a mockup, preview it at the smaller size where people will actually see it.
Match Export Format to the Workflow
Use PDF for printing and multi-page resources. Use PNG for design and social media. Use JPG for lightweight previews.
FAQs
Can I create handwritten pages online for free?
Yes. You can paste typed text into HandwritingTool, choose a handwriting style, adjust paper and spacing, preview the page, and download it as PDF, PNG, or JPG.
What can I make with handwritten pages?
You can make journal pages, creative writing pieces, teacher worksheets, recipe cards, greeting card drafts, design mockups, newsletter inserts, and social graphics.
What format should I download?
Use PDF for printing and complete documents. Use PNG for design assets and social posts. Use JPG for quick previews or smaller image files.
How do I make handwritten pages look professional?
Use readable handwriting, short paragraphs, balanced margins, natural line spacing, and a paper style that fits the project. Preview the full page before exporting.
Can I use typed text from Word or Google Docs?
Yes. Copy text from Word, Google Docs, Notepad, or another editor, paste it into the converter, adjust the settings, and export the handwritten-style page.
Final Thoughts
Creating handwritten pages online is a flexible workflow for creative and professional projects. You can draft quickly, edit cleanly, preview the page, and export a finished handwritten-style result without rewriting everything by hand.
Use HandwritingTool.com when you need journal pages, creative writing pages, teacher worksheets, recipe cards, greeting card drafts, design mockups, or note-style visuals from typed text. Start with clean writing, choose the right paper, tune the spacing, and export in the format that fits your final project.
Use the Converter Responsibly
HandwritingTool is best for readable notes, drafts, worksheets, examples, journal pages, printable resources, and document previews. Review your output carefully before printing or sharing it.